Showing posts with label Stampin' Up. Show all posts

Sunday, 24 January 2016

Documenting December Part 3 - The Final Part

Good evening.  I hope everyone is well and has had a lovely weekend.  I was very lucky to enjoy a whole day's scrapping yesterday at my local crop, as well as spending a lot of today making some (only2) Project Life pages.
 
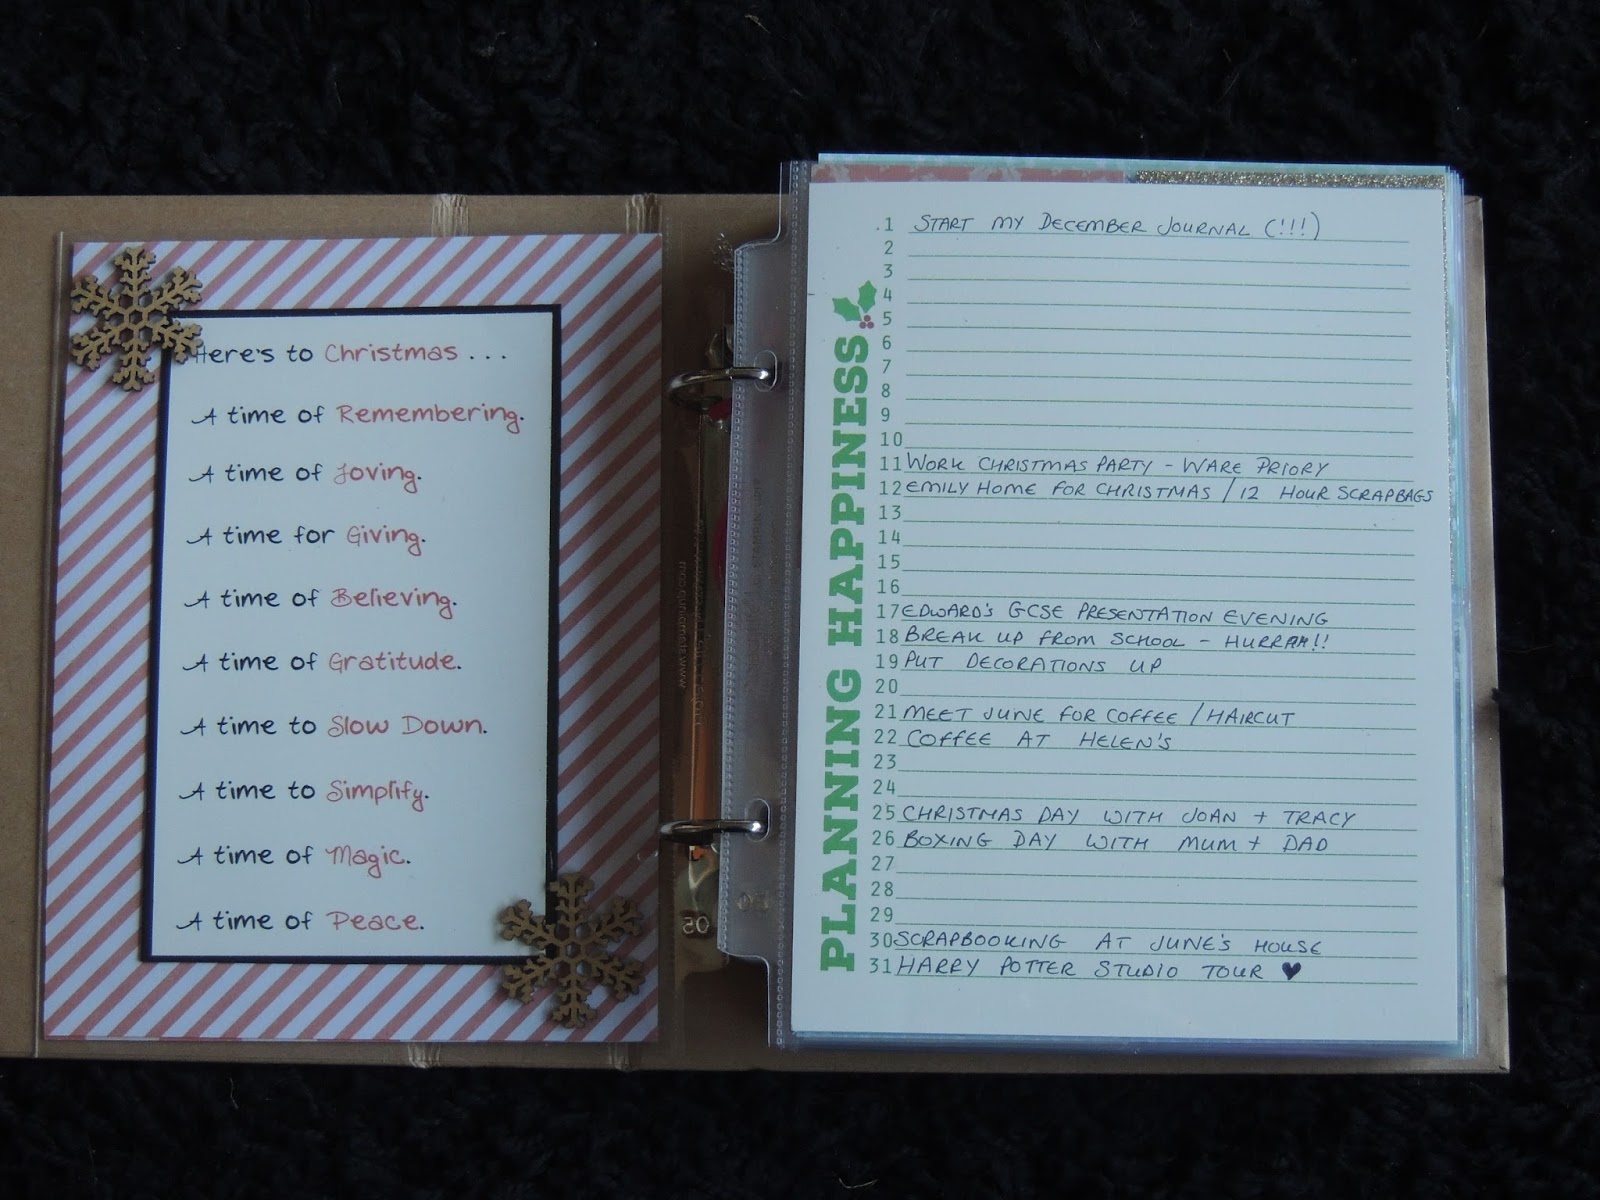
Here is the third and final part of my December album, which is from 23rd to 31st December. We had a wonderful final day of 2015 - we made a return visit to the Harry Potter Studio Tour.  I was particularly keen to see it decorated for Christmas, but the highlight was definitely the Hogwarts Express. I made two collage pages to document our day.  On the final page, I took time to reflect on how much I enjoyed making the album, as well as thinking ahead for the new year.


I hope you have enjoyed looking at my album.  I've really enjoyed making it and I'm very proud of it.  I'm full of ideas of how I can document December 2016 - although I'm not counting down, I'm happy to wait!

Thanks for dropping by.  Take care

Michelle x

Sunday, 10 January 2016

Documenting December Part 1


Happy New Year!  It's been a while I know, but hey, new year, new me??!!
 
I wanted to share with you the first part of my December album.  I've never started one of these before, and quite frankly, I never thought I would get beyond the first few days!  The reason for making in the first place, was to try and help me focus in December.  I find the whole Christmas thing quite difficult, trying to think of everything, all that shopping, not to mention the money aspect.  There's an awful lot of pressure to have the perfect Christmas, and it never seems to happen.  I tried to adopt the whole "just go with it" approach, and honestly, it really helped.  This Christmas was possibly the most relaxed one we've had in a long while.
 
So to the album.  I used a 6" x 8" Stampin' Up kraft album, along with their Hello December 2015 Project Life cards and embellishment kit.  I supplemented the papers with some of the extra papers I bought with my Like For Ever kit (Wish List - Cocoa Vanilla).  I also pulled out some Christmas themed washi tape, wood veneer snowflakes, gold glitter tape etc etc.  My colour scheme was mainly a soft mint green, blue and red with gold accents.
 
I also joined Shimelle Laine's Journal Your Christmas class to help with the prompts.  I didn't follow that religiously, but it gave me a good starting point.
 
So here's the beginning, up to and including Day 10.  Enjoy :)


I'm very pleased with how these pages turned out.  I hope you have enjoyed having a little peak.  I'll be posting Part 2 in the next couple of days.  Thanks for dropping by.  I really appreciate any comments.
 
Take care
 
Michelle

Saturday, 3 October 2015

Card Swap Challenge - September

 
Today I am sharing the card I made for this month's Card Swap Challenge group.  The brief was to get to know your partner, and to reflect this in the card.  Oh, and the card had to have some movement to it!  I was ok with the challenge until the last part, as I don't generally make this type of card - but there again, it is a challenge group.  After much trawling through Pinterest, I came across this card type.  I don't know what it's called - it's a bit like a Z Fold, but it may also be called a Lever Card (any suggestions gratefully received!).  I made a prototype in cheap card, and fiddled with it until I was happy.  Then on to the real thing.
 
Sue, my recipient, loves the colours lavender, turquoise and silver, and nature (birds, butterflies and squirrels).  She also likes clean and simple cards.  Perfect - ticks all the boxes for me.
 
I made the card base in SU's Tempting Turquoise.  The two white panels were stamped in Wisteria Wonder ink, using the Flowering Flourishes stamp set.  I stamped a variety of small butterflies from Papillon Potpourri (one of my favourites), and punched them out with the corresponding punch.  I used Tempting Turquoise, Wisteria Wonder and a silver inkpad that I've had for years.  The butterflies were curled a little bit for dimension, and I added a couple of tiny gems to each one to finish them off.  The banner sentiment was stamped from a set called Floral Wings.


I've just got back from a residential school trip to Wales.  We went to a PGL site and had five glorious days with a great group of children.  There were a few tears at bedtime, not enough sleep, and the obligatory travel sick child, but apart from that, it was a lot of fun.  I was planning on a restful weekend, and maybe catching up on a little bit of scrapbooking but that is not looking likely at the moment.

Talking of scrapbooking, check out the new blog button on the right hand side of my blog.  I joined a scrapbook kit subscription group in May, called likeforever, and it has really helped inspire my layouts.  The person who owns and runs likeforever, Nicola, is absolutely brilliant.  She puts together amazing kits, using the latest collections.  There is a very friendly and supportive Facebook group for subscribers, and so much inspiration.  I recommend that you take a look.  I'm loving being a part of it.  I hope to give my blog a little bit of a facelift over the coming weeks, and post some of my layouts too.

Well, that's me done for today.  Thanks for dropping by, and I am very appreciative of your comments.  Have a great weekend.

Take care

Michelle x

Monday, 21 September 2015

Cascade Card - Card Swap Challenge Group

I though it was about time I popped back to my poor neglected blog and updated it.  Life has been crazier than ever, with very little time to craft, never mind blog. 
 
After the end of my last card swap group, I was invited to join a challenge group by the lovely Sue at Birdcage Craft Studio (check out her blog here ).  My first challenge was to make a cascade card but there were certain conditions attached - no flowers, no butterflies (HELP!!), no white, pink, blue, orange or yellow.
 
First things first - how to make a cascade card.  Thank heavens for Pinterest and You Tube!  I decided to go for a set of papers from Stampin' Up - Timeless Elegance - with the colours Basic Black, Very Vanilla and Sahara Sand.  The problem I encountered was how to embellish it.  I'm not a very fussy or ornate person, and I was a bit worried that my card would look boring compared to everyone else's. I decided to go with my instincts and be true to myself.  So I made a little plaque and added a die cut "hello" to it, and left it at that. 


I hope you like it - I was quite pleased (in the end!).  Wait until you hear about the next challenge!  I'm still mulling it over.

Take care and thanks for dropping by. 

Michelle x

Saturday, 30 May 2015

Shaving Foam!

What a fab afternoon I have had today!  And this is the card that started it all off.  This is the beautiful card I received from Zoe, from my card swap group.  I was fascinated by the background, and she told me it had been made using the shaving foam technique.  She briefly explained how to go about it, and after checking out a couple of videos on Youtube, I thought I would have a go.
 
 
I used the Stampin' Up reinkers that I had (Brights), and created two different coloured backgrounds,  The first one used Real Red, Pumpkin Pie and Daffodil Delight.  I realised after a few tries, that I needed to swirl it a little bit more, so I had another go, this time using Tempting Turquoise, Bermuda Bay, Old Olive and Pacific Point.  This batch looked much better - more marbled and less splodgy.  And here are the four cards I made from them.


Each one is different and I'm pleased with them all, but my favourites are definitely the blue ones.  I know I will be having another play with this technique, and I may even use it for my scrapbooking.  What has been really lovely today, is just having the opportunity to play - usually I make cards for a specific reason.  Today, I could just enjoy getting messy and experimenting, with no pressure. 

Apart from the reinkers and shaving foam, I also used:
Card stock : Real Red, Bermuda Bay, Basic Black and Digital Smooth card stock.
Stamps : Gorgeous Grunge, Petite Petals, Butterfly Basics, Teeny Tiny Sentiments, Crazy About You and Sheltering Sky - Stampin' Up, as well as Your Special Day by Marion Emberson.
Sequins, Gems, Punches, Dies and Glossy Accents.

Hope you like them and thanks for dropping by,  Enjoy the rest of your weekend.

Take care

Michelle x

Wednesday, 6 May 2015

New Home

 
Hi.  Here's a card I made for a friend who moved house back in January.  I saw the idea for the card on Pinterest.  The base card (Very Vanilla,) is from SU, as are the embossing folder and the house stamp.  I coloured the image with my Promarkers.  I liked the simplicity of the design.
 

I'm still ploughing through my backlog of cards - got a few more to show you over the next couple of weeks.

Life is going to get even more hectic from next week, as Edward starts his GCSEs.  He's seems quite calm about them at the moment, and has been working hard - so fingers crossed.  We also have SATs in the class I am working with, so that's pretty full-on.  And finally, Emily starts a two week work placement at university.  She will have to get up at 5am every day in order to be at uni and on the minibus by 7am.  Her placement school is an hour's drive.  She'll be exhausted by the end of it.  Just as well she will coming home for 5 days to have a bit of TLC, as well as to celebrate Edward's 16th birthday.

Thanks for dropping by and hope you are all well.

Take care

Michelle x

Sunday, 1 June 2014

Pop Up Box Cards

Hi all.  Just popping in to share a couple of cards with you this evening.  I decided to have a little play with the pop-up box cards that are doing the rounds at the moment.  I'm not usually a fan of cards like this but I thought I'd give it a go.  I bought a kit from Craftwork Cards rather than faff about trying to work out all of the measurements.  The kit came with the flowers and the printed panels.
 
I actually made this card for my sister's birthday and she was delighted.


The only problem with the kit was how to attach the flowers to the box.  The suggestion was to cut "Y" shaped pieces of white card and attach them to that before attaching that to the box.  I didn't find that entirely satisfactory.
 
The I was inspired by a card Lucy Tustian posted on her blog (see it here ) and just knew I had a make a version of it - it's fab.  The plan was to make the card for my daughter's birthday later on in the month, but she's hinted at a Frozen card (she's going to be 19!).  So instead, I made it for her friend who turned 18 on Thursday.


The colour scheme is Strawberry Slush, black, white and silver, and I used the fabulous Simply Stars stamp set.  The black lace is a tape that I bought from QVC a few years ago.  The paper is SU.

You can see from the last two photos that I used acetate to attach the stars. It's a heavy duty acetate and it made it so much easier to add all the stars rather than faffing about with silly bits of card!

I hope you like these two cards.  They were good fun to make and well received.

Thanks for dropping by.

Take care

Michelle x

Friday, 18 April 2014

Scrapbags Spring Retreat - Part 1

Last weekend I had the pleasure of spending thee days at a scrapbooking retreat in a lovely hotel in Hertfordshire, organised by the lovely and amazing June.  The weekend was very relaxed, the company was great, as was the food - it was just fab!  June provided some beautiful layouts for us to complete as well as some fiendish quizzes for the more competitive of us!
 
I wanted to take a little Easter treat for all my fellow Scrapbags.  I was inspired by a video Lucy Tustian (a fellow SU demonstrator) made, and this is what I created.  All the products are Stampin' Up.


The grounds of the hotel are so pretty, and we were blessed with lovely weather, particularly on the Sunday.


It was a shame to have to leave on the Sunday afternoon.  I could have happily stayed for longer.  Tomorrow I will be showing you the layouts that I made, including my first Project Life layout,  Thanks for dropping by.  Have a lovely day.

Take care

Michelle x